

x
Type in what your trying to find.
Type in what your trying to find.
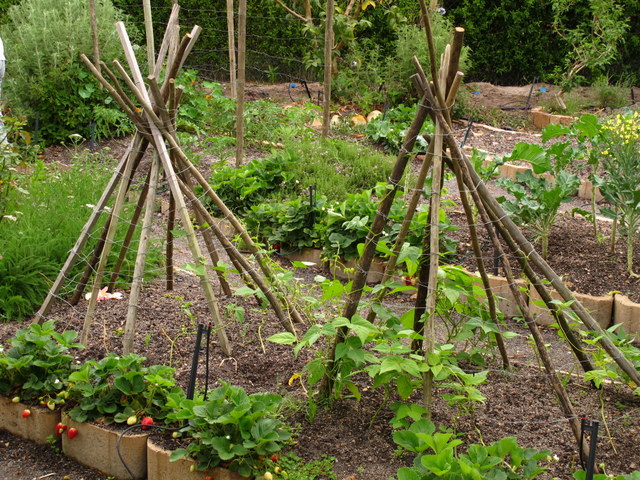
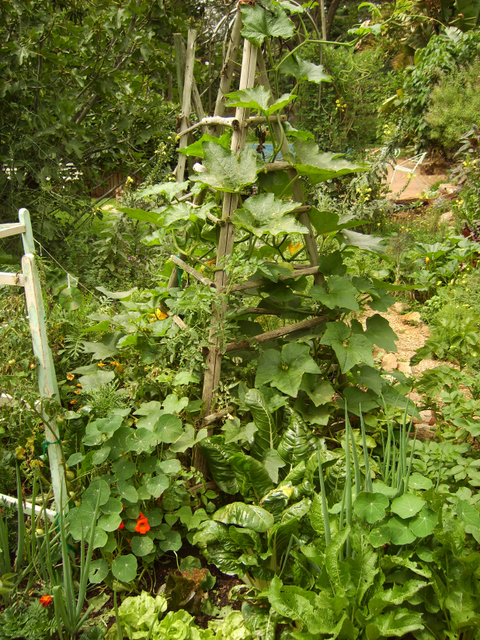
It is a truism of gardening that no matter what size our gardens are, we run out of space. The vegetable garden is no exception. Lured by pictures on seed packets, we plant until our gardens burst. A simple solution is to grow upwards. I call it 3D gardening. Adding tripods and other vertical structures to our vegetable gardens maximises space. Vegetables, such as butternut and gem squash, which normally ramble across metres of ground, can easily be trained to grow up tripods.

Tripod full of fruit & vegetables
There are additional advantages to this method:
1. The vegetables are lifted off the ground, limiting attacks from bugs and assisting all-round ripening.
2. Airflow is increased, reducing disease.
3. Plants with differing needs, which are beneficial to one another, can be combined on one tripod.
4. The ground around the base of the tripod can be utilised for non-climbing plants.

Tomatoes on trellis
Adding vertical elements to our gardens creates visual appeal and interest – even when nothing is growing on them. Attach a trellis or a grid of gum poles to a sunny wall for tomatoes and beans. Create an arch at the entrance to your vegetable garden and combine flowers and vegetables on it. Beans and cucumbers will happily climb up through wisteria or roses.

Bean runners on an arched trellis

The copper tripod is now a ‘bird’ cage
I love experimenting with different designs. I once created an elegant copper tripod by soldering plumbing pipes together. I threaded it with blue washing line and it looked beautiful – but was disastrous as a plant support. Copper is an excellent heat conductor and burnt everything that grew up it. It didn’t go to waste, it is now a birdcage for my colourful collection of wire benders’ beaded parrots.

Bamboo and vine tripod

Use your imagination. An abandoned ladder with a fresh coat of paint becomes a pot plant holder
Recycled wood wigwams

Tripod made from metal poles sunk into cement blocks – portable yet sturdy
There is wide range of suitable material for tripods: Gum poles, thatching laths and bamboo are all ideal. When constructing a permanent tripod make sure it won’t block the sun. To prevent you impacting the soil while you are building the tripod, use a few wide planks to stand on. Before planting multiple vegetables in and around one tripod, enrich the soil well with rotted manure and compost. In the centre of the tripod, create a mound – if necessary, add more compost.
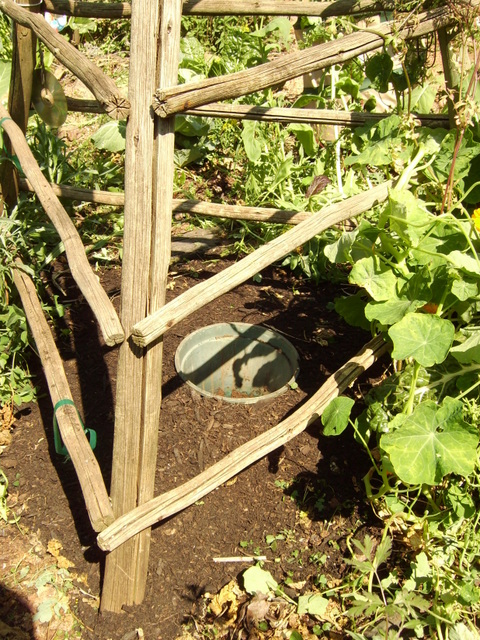
Bury a watering pot under the tripod
Dig a hole in the middle of the mound and bury a plastic nursery pot, leaving the rim sticking out a few centimeters. The earth should be mounded up around the pot, with its rim at the top of the slope. As the plants grow, their roots spread around the bottom of the pot. When you fill the pot with water, it slowly drains out of the holes at the bottom of the pot, directly and gently watering the roots. Once the plants start bearing, use the central pot to feed your plants with organic liquid fertiliser. This delivers the food directly to the roots without any wastage. Watering into the pot avoids wetting the leaves and lessens the chance of disease.
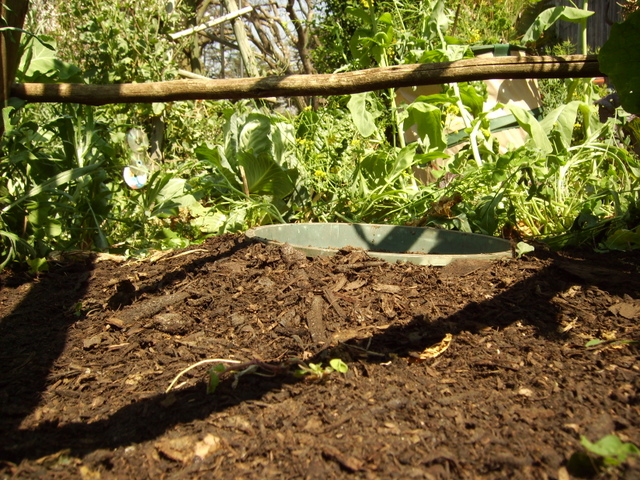
Bury the watering pot up to its rim in mounded soil
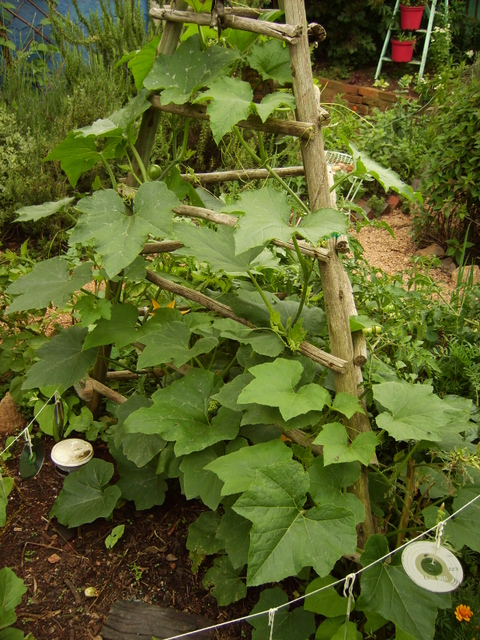
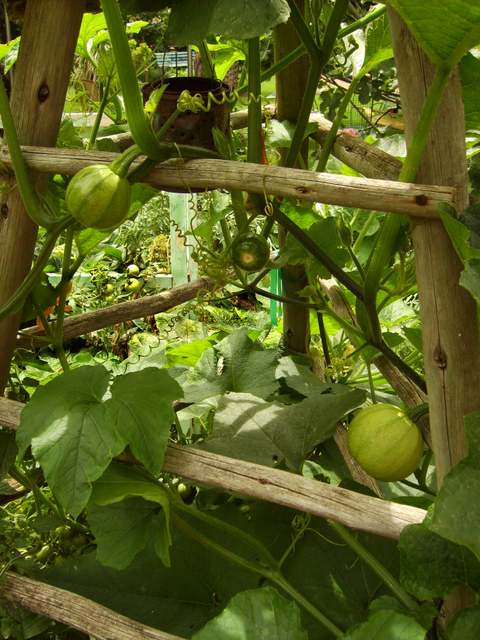
Tripod with gem squash and tomatoes
An excellent tripod combination is gem squash, beans and tomatoes, with carrots, lettuces, radishes and Swiss chard (Bright Lights) around the base. The plants are from different families plus they benefit one another. Adding a few companion plants, such as basil and nasturtium, completes the picture. As the gem squash grows, twine the vines up into the tripod because they will insist on trying to spread outwards. Once the gem squash reaches the top, wind it back down again until the tripod is completely covered. At that stage, snip off the growing point of the leading vines, leaving just one or two to keep twining in and out. The beans will happily grow up through the gem squash and tripod on their own.
Beans, gem squash and tomatoes grow up the tripod with lettuce chard, other vegetables and nasturtiums around the base
Help the tomatoes grow vertically by tucking the vines into the tripod and around the stems of the gem squash – the hairy gem stems keep them in place without the hassle of having to tie them up.

Summer tripods
Squash and tomatoes
By combining these plants, we create a complex yet natural pattern of beneficial relationships: The plants on the tripod all have similar watering requirements: they prefer being watered at root level rather than overhead watering. As the gem squash grows faster and bears earlier than the beans or tomatoes, it provides support for the other two. The beans add nitrogen to the soil and the lettuces on the southern side of the tripod benefit from the shade in midsummer.

Use tripods for growing berries too
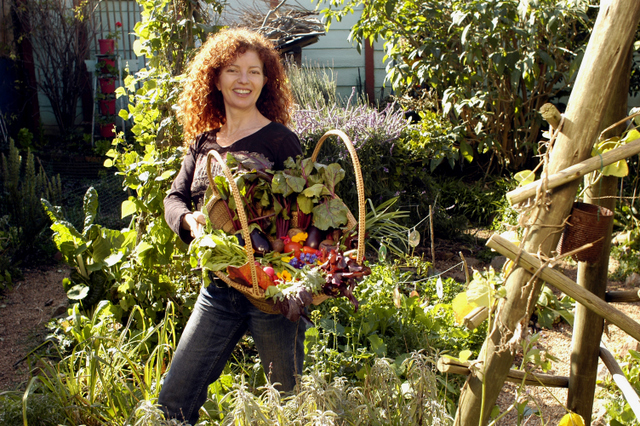
Radishes protect the gem squash from beetles and shade the young carrot seedlings. If you leave one to go to seed, their pink flowers attract beneficial insects. Basil is beneficial to the tomatoes and carrots, repels harmful insects and doesn’t compete for root space. The nasturtium also chases away the bad guys and covers the soil, preventing it from splashing up onto the tomatoes and squash, helping minimise soil borne disease. All that remains for the gardener to do is enjoy the harvest.
For more on creating tripods see my website Jane’s Delicious Garden – Vertical Vegetables

Summer tripods


Well now I’m annoyed. How am I supposed to maintain my curmudgeonly non-vegetable growing stance in the face of such clever and appealing ideas? I’m seeing a tripod emerging from my front garden, festooned with luscious tomatoes and runner beans. But with any luck it’s too late in the season to start?
It’s never too late to start!!!
Too late for beans Catherine, but why not get it ready for autumn peas. It’s just around the corner.
Why a plastic pot, why not clay?
Hi there,
You can use clay – just make sure the holes are big enough so they don’t get blocked up. The reason I use plastic is: 1. I usually have a few of them stored in my shed after purchasing plants and I like to recycle those. And 2. I wouldn’t want to bury a more expensive clay pot, I’d prefer to keep that as a surface one.
Jane
What a fantastic idea with the pots – I’m going to implement that with my next plantings – thank you!