

x
Type in what your trying to find.
Type in what your trying to find.
How do you find the time to maintain a compost heap when you don’t even have the time to do the fun stuff in your garden? This is an increasing situation I am seeing with gardeners in urban areas. There is also a lack of space for the traditional compost heap. I commonly see people throwing their kitchen scraps in the general rubbish bin and the reason always given is that composting is just too hard and too much work.
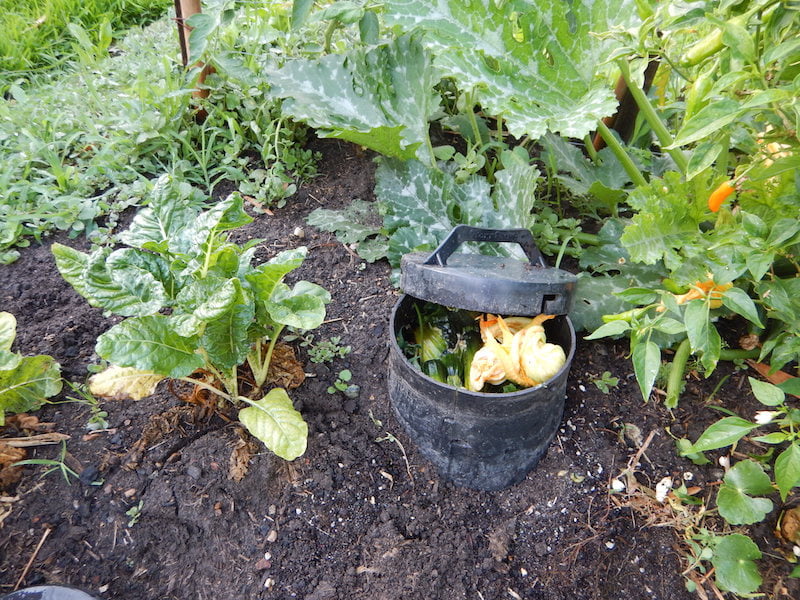
My DIY in-ground worm farm ready to dig in
I have spent years thinking and experimenting with composting and how to tailor methods that will suit every gardener’s situation and I think there is a perfect solution for the time poor gardener – the in-ground worm farm. The simplest composting solution of all is to just dig a hole in the soil and bury your kitchen scraps, and the natural earthworm population breeds up and consumes what you have buried. However, the advantage of an in-ground worm farm is that you can create a micro environment that allows you to introduce worms that are better adapted to rapid feeding such as tiger and red worms, using them to speed up the composting process.

Compost worms
The advantages of in ground worm farms are numerous:

How to make a DIY drainage pipe in-ground worm farm
An in ground worm farm is a very simple thing to create and can be easily constructed from an old bucket or piece of PVC drainage pipe. The most important thing is to use material that has a reasonably large diameter. Ideally, a pipe should be at least 100mm (4 inches) in diameter to achieve a critical mass of organic matter that does not dry out too quickly, something that helps sustain worm populations in my observations. An old bucket would also generally be of suitable diameter but you may need to check that it will not perish or crack up if you want reasonable longevity for your worm farm.

Make a lid for your DIY drainage pipe in-ground worm farm
An old length of PVC drain pipe is an ideal material to use as it is formulated to last a long time and the wider the better within reason, with a diameter of 150mm (6 inches) being close to optimal in my experience. A cylindrical shape for your in ground worm farm works well terms of being able to easily extract it from the soil in order to be able to move it to different positions around the garden.

The tube down which you put all your kitchen scraps in the in ground worm farm
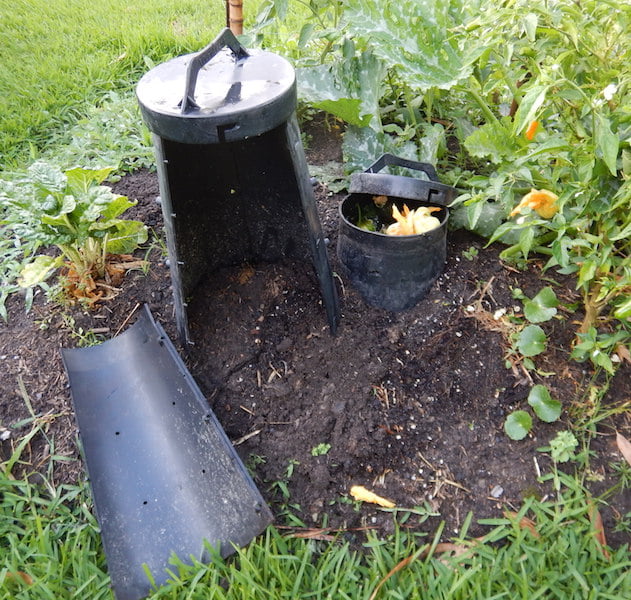
Cut horizontal slots into the pipe in the below-ground section, using a large drill to make initial holes and then a hacksaw. This lets the worms can move freely in and out. Make a lid for the top of the unit to keep out vermin – mine has aerating holes covered with some fly wire and a top handle so it’s quick and easy to open and close, or you could just use a securely fastened wire cover. In my DIY in-ground worm farm, the bottom buried section is about 20cm (8 inches) tall and the above-ground section into which I put all the kitchen scraps and paper/straw is about 30cm (12 inches) high.

Worm Feast unit before assembly
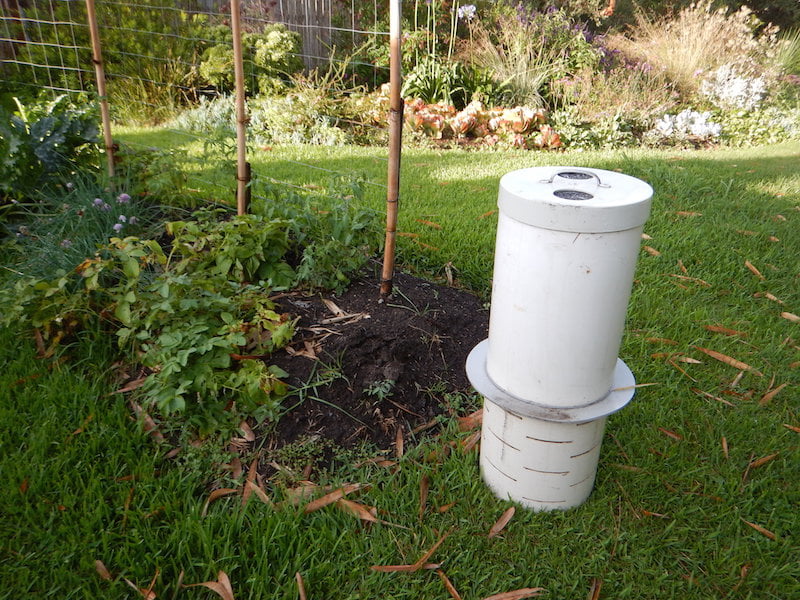
There are commercially available in ground units available such as the Worm Feast unit. This is a useful product that is easy to assemble and install and works extremely well, particularly as a waste disposal unit. When fully assembled it resembles a science fiction hybrid somewhere between a Darth Vader mask and a Dr Who dalek, but don’t let this put you off, as once it is buried in the soil ready to go all you see is a small black lid. The lid is removed to add all your kitchen scraps, but make sure you also add some sort of fibrous material such as chopped straw occasionally to add some aeration to the pile inside the Worm Feast.
All you can see is the black lid of the Worm Feast when it’s buried
It does, however, have a couple of limitations in my opinion. Firstly, the inverted cone shape makes it very difficult to extract from the soil when you want to move it; and secondly, it has a lack of holes or slots along the outside which means that the worms and nutrients tend to only move out the bottom of the unit rather than the sides. The latter issue can be remedied by drilling or grinding some extra holes or slots in the side before it is installed.
Conical shape of the Worm Feast
Whether you use a commercial unit or one you construct yourself, the in ground worm farm is an extremely simple and ultra-effective composting solution that will dramatically reduce your organic waste stream if you are currently disposing of it in the bin. The only word of extra advice I would give is to ensure that you add some fibrous material such as shredded cardboard or chopped straw to your kitchen scraps to ensure the worms have adequate oxygen to breathe. You will be pleasantly surprised by the extra growth in your garden, and can also take pride in diverting all that carbon from going into landfill (and creating the greenhouse gas methane) to your soil, where it is doing a power of good for your plants. This is one of the simplest and best things you can do every single day to help the environment at an individual level.


I love your design, Angus! My next garden is likely to be very small but I can see this working well. I had thought I’d stop composting. Thanks for showing us how it can be done.
Sounds like a great idea as I have found Darwin to be too hot for above ground worm farms. How far apart should you space them? I work in an early learning centre/preschool and this could be a great way of teaching the kids environmental sustainability as well as disposing of their fruit scraps at morning tea and recycling paper after drawing on it. I think we would need a few farms to cope with the amount of scraps though. I’m also keen to get this happening at home…when the chooks fall off their perches though.
Brilliant! I’m off to check out my old pipe and bucket collection. Plan to put is several down the middle of the raised bed veg garden. Existing worm farm is kept in the garage, which seems to cope with hot days, but a problem if away from home for several weeks as it is not accessible for anyone else to add more food.
Hi Anne, if you are going away for a number of weeks you can put a bunch of wet cardboard in your worm farm. I have found that it can take a while for my worms to eat cardboard so this could be a solution for you.
I started doing this a couple of years ago with a couple of buckets, and feel that the soil is so much better. Somehow the red tiger worms also migrated into my compost tumbler, and that is pumping along because of them.
Do you think a similar idea would work in a Vege Pod? Allowing the worm juice to run down into the water reservoir to wick up to the plants?
So to make sure I understand this right I have 12 inches above ground and 8 inches buried, that I have cut slats in for the worms? These will be buried around garden area?
I do realize this article is 6 years old, and you may have came up with even better ways of doing this, as you watched what worked and what didn’t, that you would be willing to share.